Swift Introduction Core Graphics for Beginners
Core graphics is a lightweight framework used to make 2d graphics and animations. It runs extremely fast, and is very flexible in what it can do. Core graphics sets at a lower level then UIKit, this gives you more control, however it is more difficult to setup and requires more knowledge. Lets take a look at drawing a square and circle.
Drawing a Square
Lets start of by drawing a simple square in core graphics. Create a new single view application in xcode, then open up the ViewController.swift, all the drawing is done in code!

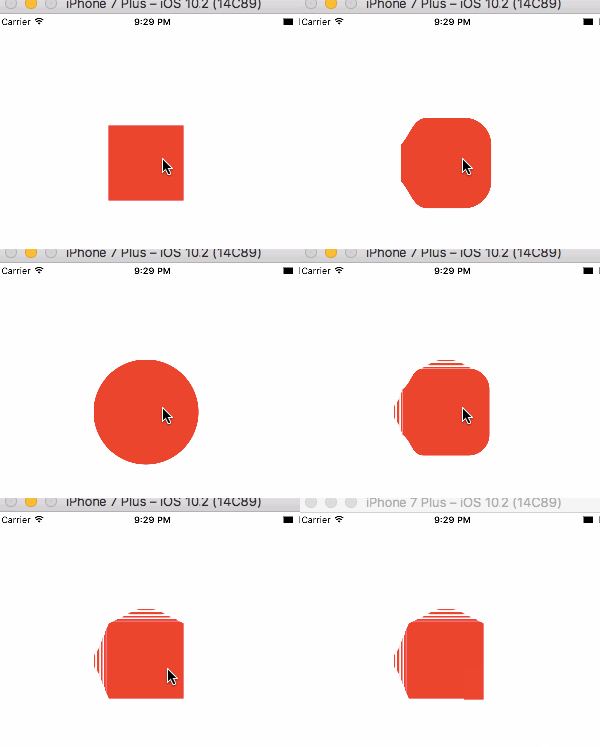
In viewDidLoad() add the following code, and run the app and you will see your square draw as above:
        let squarePath = UIBezierPath() // 1
        squarePath.move(to: CGPoint(x: 100, y: 100)) // 2
        // 3 & 4
        squarePath.addLine(to: CGPoint(x: 200, y: 100))
        squarePath.addLine(to: CGPoint(x: 200, y: 200))
        squarePath.addLine(to: CGPoint(x: 100, y: 200))

        squarePath.close() // 5


        let square = CAShapeLayer() // 6
        square.path = squarePath.cgPath // 7 Apply the squarePath to our layer
        square.fillColor = UIColor.red.cgColor // 8 Fill it with red
        self.view.layer.addSublayer(square) // 9 Add it to our view
Wow – that’s alot of code just for a square, and pretty complicated if this is your first time using core graphics! The animation below shows what each line of code is doing visually.
Essentially whats happening is:
- Define a new UIBeizer path which is used to draw the shape path in coordinates.
- Move the “pencil” to the starting coordinates
- Draw a line from the previous point to the new point
- This repeats to draw the outline of a square
- When the square has finished drawing we need to close it off, E.g remove the “pencil” from the “paper” (The screen)
- Create a new CAShapeLayer, this is whats drawn to the screen
- Set the shape layer path to the square we just drew
- Fill in the square we drew with a red color
- Draw it to user’s the screen
Phew who knew a square would be complicated?
Why use Core Graphics?
Well usually you use it if there is something that you cannot accomplish with UIKit which is usually used to add images, buttons and basics shapes to your application. One example is the following animation which is done in core graphics, you can view the tutorial here.

You would also use core graphics for the following reasons:
- It runs faster then UIKit
- When developing games using SpriteKit
- You need a view or shape that will adjust dynamically to data. E.g Drawing stock charts from stock data
So pretty much use UIKit where you can, and if it does not solve your problem start looking at core graphics.
Drawing a Circle
Now lets draw a circle, add the following function:
    func circlePathWithCenter(center: CGPoint, radius: CGFloat) -> UIBezierPath {
        let circlePath = UIBezierPath()
        circlePath.addArc(withCenter: center, radius: radius, startAngle: -CGFloat(M_PI), endAngle: -CGFloat(M_PI/2), clockwise: true)
        circlePath.addArc(withCenter: center, radius: radius, startAngle: -CGFloat(M_PI/2), endAngle: 0, clockwise: true)
        circlePath.addArc(withCenter: center, radius: radius, startAngle: 0, endAngle: CGFloat(M_PI/2), clockwise: true)
        circlePath.addArc(withCenter: center, radius: radius, startAngle: CGFloat(M_PI/2), endAngle: CGFloat(M_PI), clockwise: true)
        circlePath.close()
        return circlePath
    }
Then add the code to draw the circle on screen to viewDidLoad:
        let circle = CAShapeLayer()
        circle.path = circlePathWithCenter(center: CGPoint(x: 200,y: 400), radius: 50).cgPath
        circle.fillColor = UIColor.blue.cgColor
        self.view.layer.addSublayer(circle)
Now run and you will see the circle drawn on screen:

So drawing a circle is different from the square, you can see it is drawn with “addArc”. Essentially what this does is draw an arc

This completes a circle, we then fill it in with the color blue and draw it to the screen in viewDidLoad().


